Get gear up to be blown away by scientific discipline: ceiling fans are cheaper to run and are importantly more energy efficient than air conditioning.
It turns taboo that cap fans accomplish a lot just through air circulation. That means that they fetch tank air into a room during summertime, and are useful in winter because they evenly pass around any excess warm air produced by your heater.
If you'rhenium looking to perform a ceiling rooter installation of your own, or replace an existing ceiling fan, in that location's even more good news: it International Relations and Security Network't Eastern Samoa hard American Samoa it looks, and john make for a comforting DIY project if you've got a redundant afternoon.
Just follow this handy guide. We'll record you how to install a ceiling fan yourself, and throw in a few bonus tips and pointers in addition.
Everything You Need to Perform Your Ceiling Fan Instalmen
 You simply need a a couple of standard tools to complete your ceiling fan instalmen:
- Monotone-head and a Philips head screwdriver
- Wire tinsnips
- Stepladder
Optional:
- Exercise with plane-head and Philips head bits
- Electrical examiner
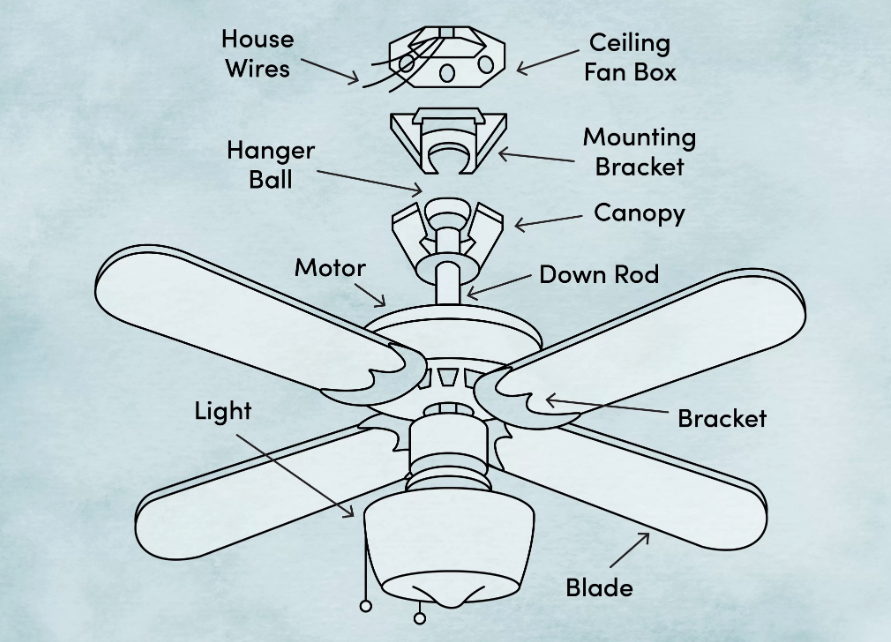
Become Familiar With These Cap Fan Components
 Paradigm via Wayfair.com
There are a few components you want to bring fort acquainted with before beginning your ceiling fan installation.
- The electric car boxful is a metal housing in the cap that contains all the wiring for your cap fan. If there was an existing ceiling fan in berth prior to your current installation, it should also already be braced to take for the weight of your winnow—though information technology's measurable to verify this for rubber.
- The bracket is the metal piece that holds the cap fan in situ. The electrical box stays inside the ceiling, while the bracket is connected to IT from below the cap crinkle.
- The motor drives the fan, and too serves every bit the hub for the light and rooter along/off switches
- The cowl is a metal cover that goes over the motorial and bracket for aesthetics
- The light kit contains the electric-light bulb sockets, and is connected to the motor via two or troika simple wires
Things to Know Ahead of Your Cap Fan Installation
- There must be at least 8-10 inches betwixt the blades of the ceiling fan and the ceiling.
- You must also maintain an 18 inch clearance betwixt the blades and the walls, or any other obstruction.
- Ceiling fan blades must be hung at to the lowest degree 7 feet to a higher place the deck, and the fan does its best if hung at the least 8-9 feet up.
- If the cap is quite high, or if the fan is existence installed on a slanted ceiling, a longer down-pole might be necessary and so the blades put on't scrape the ceiling and the fan keeps its efficacy.
How to Install a Cap Fan Step past Abuse
 First, before performing any electrical repair or installation, always tight the power off at the circuit breaker in order to avoid the risk of shock.
- If you have an electrical examiner, you can use up IT ahead beginning the installation to ensure that the power is definitely turned forth at the breaker.
- First, attach the bracket to the electric box via the ii or more prospicient screws. Instead of tightening the screws entirely the way, make sure they are screwed in adequate to hold the angle bracket securely, but leave a couple inches allowance so that you can tie in the wiring in the pursuit steps.
- The motor should come pre-assembled, but if it does not, follow the manufacturer's instructions to put off IT together before proceeding.
Tip: Thusly that you wear't have to support the buff motor yourself during the stallion instalmen, the manufacturer possible enclosed a hook OR hanger in the design. Attach the hanger to the bracket, and then string up the motor to IT from one side. The motor bequeath hang down, making information technology close enough for you to attach the wiring, simply too leaving the electric box and square bracket partially unprotected for the wiring to be attached. - Hang the motor from the pendant attachment, and begin connecting the wiring. Tie in the wires from the motor to the comparable wires in the electrical boxwood. The black wire goes with black, the white wire with white, and the leafy vegetable with green. If there is a red electrify coming from the electric caparison, connect the blue wire to it. Otherwise, get in touch twist the blue sky and black wires that are coming from the motor together, and confiscate the two of them to the colored telegram in the electric box.
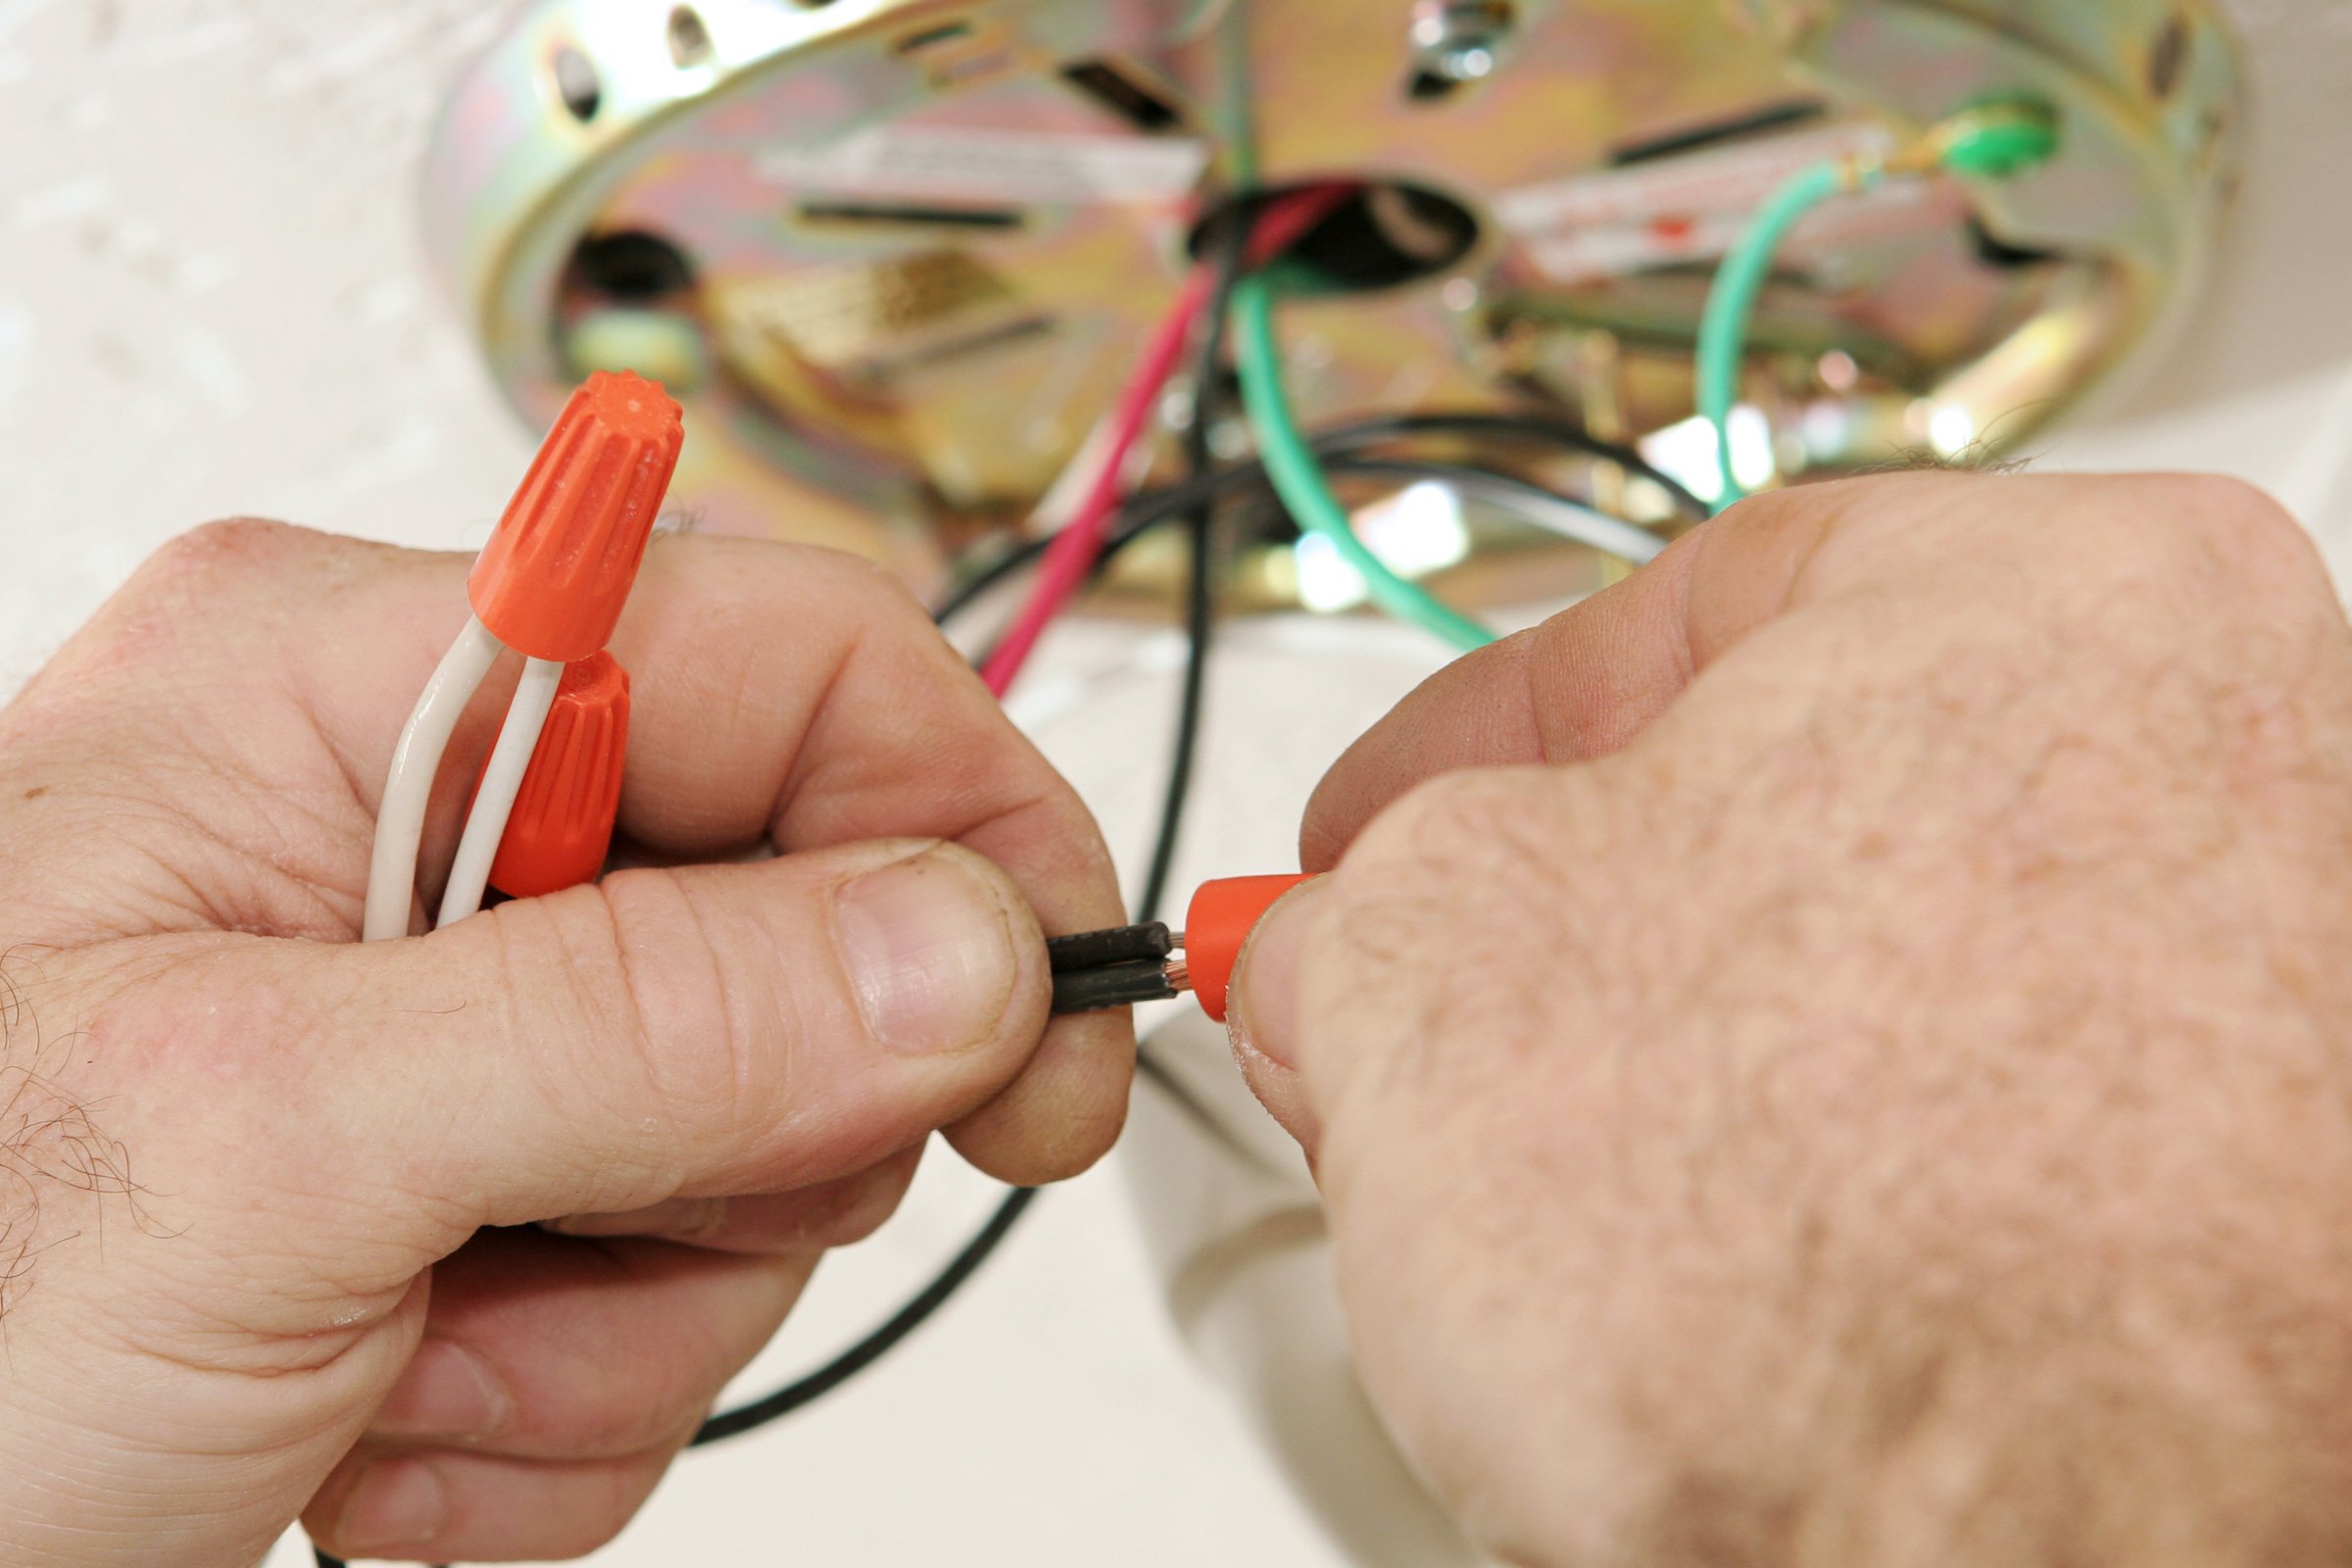
- The naughty telegraph is for the light up, the pitch-dark wire for the rooter, the blank is the common conducting wire, and the green is the grounding electrify. In older homes, there is just one wall switch for the light source and fan, which is wherefore in that respect may only live one wire – the black wire – for both. Newer homes may include a red-faced telegram then that the fan and light can Be operated independently.
Hint: Wrick the wires together thinly to connect them. Then, put the wire nut over them and use that to do most of the twisting. This is easier and more comfortable.
- Once the wires are wired, push them every last into the metal electric box. This may take a bit of finagling.
- Now, stiffen those screws happening the bracket to bring IT up flush with the ceiling.
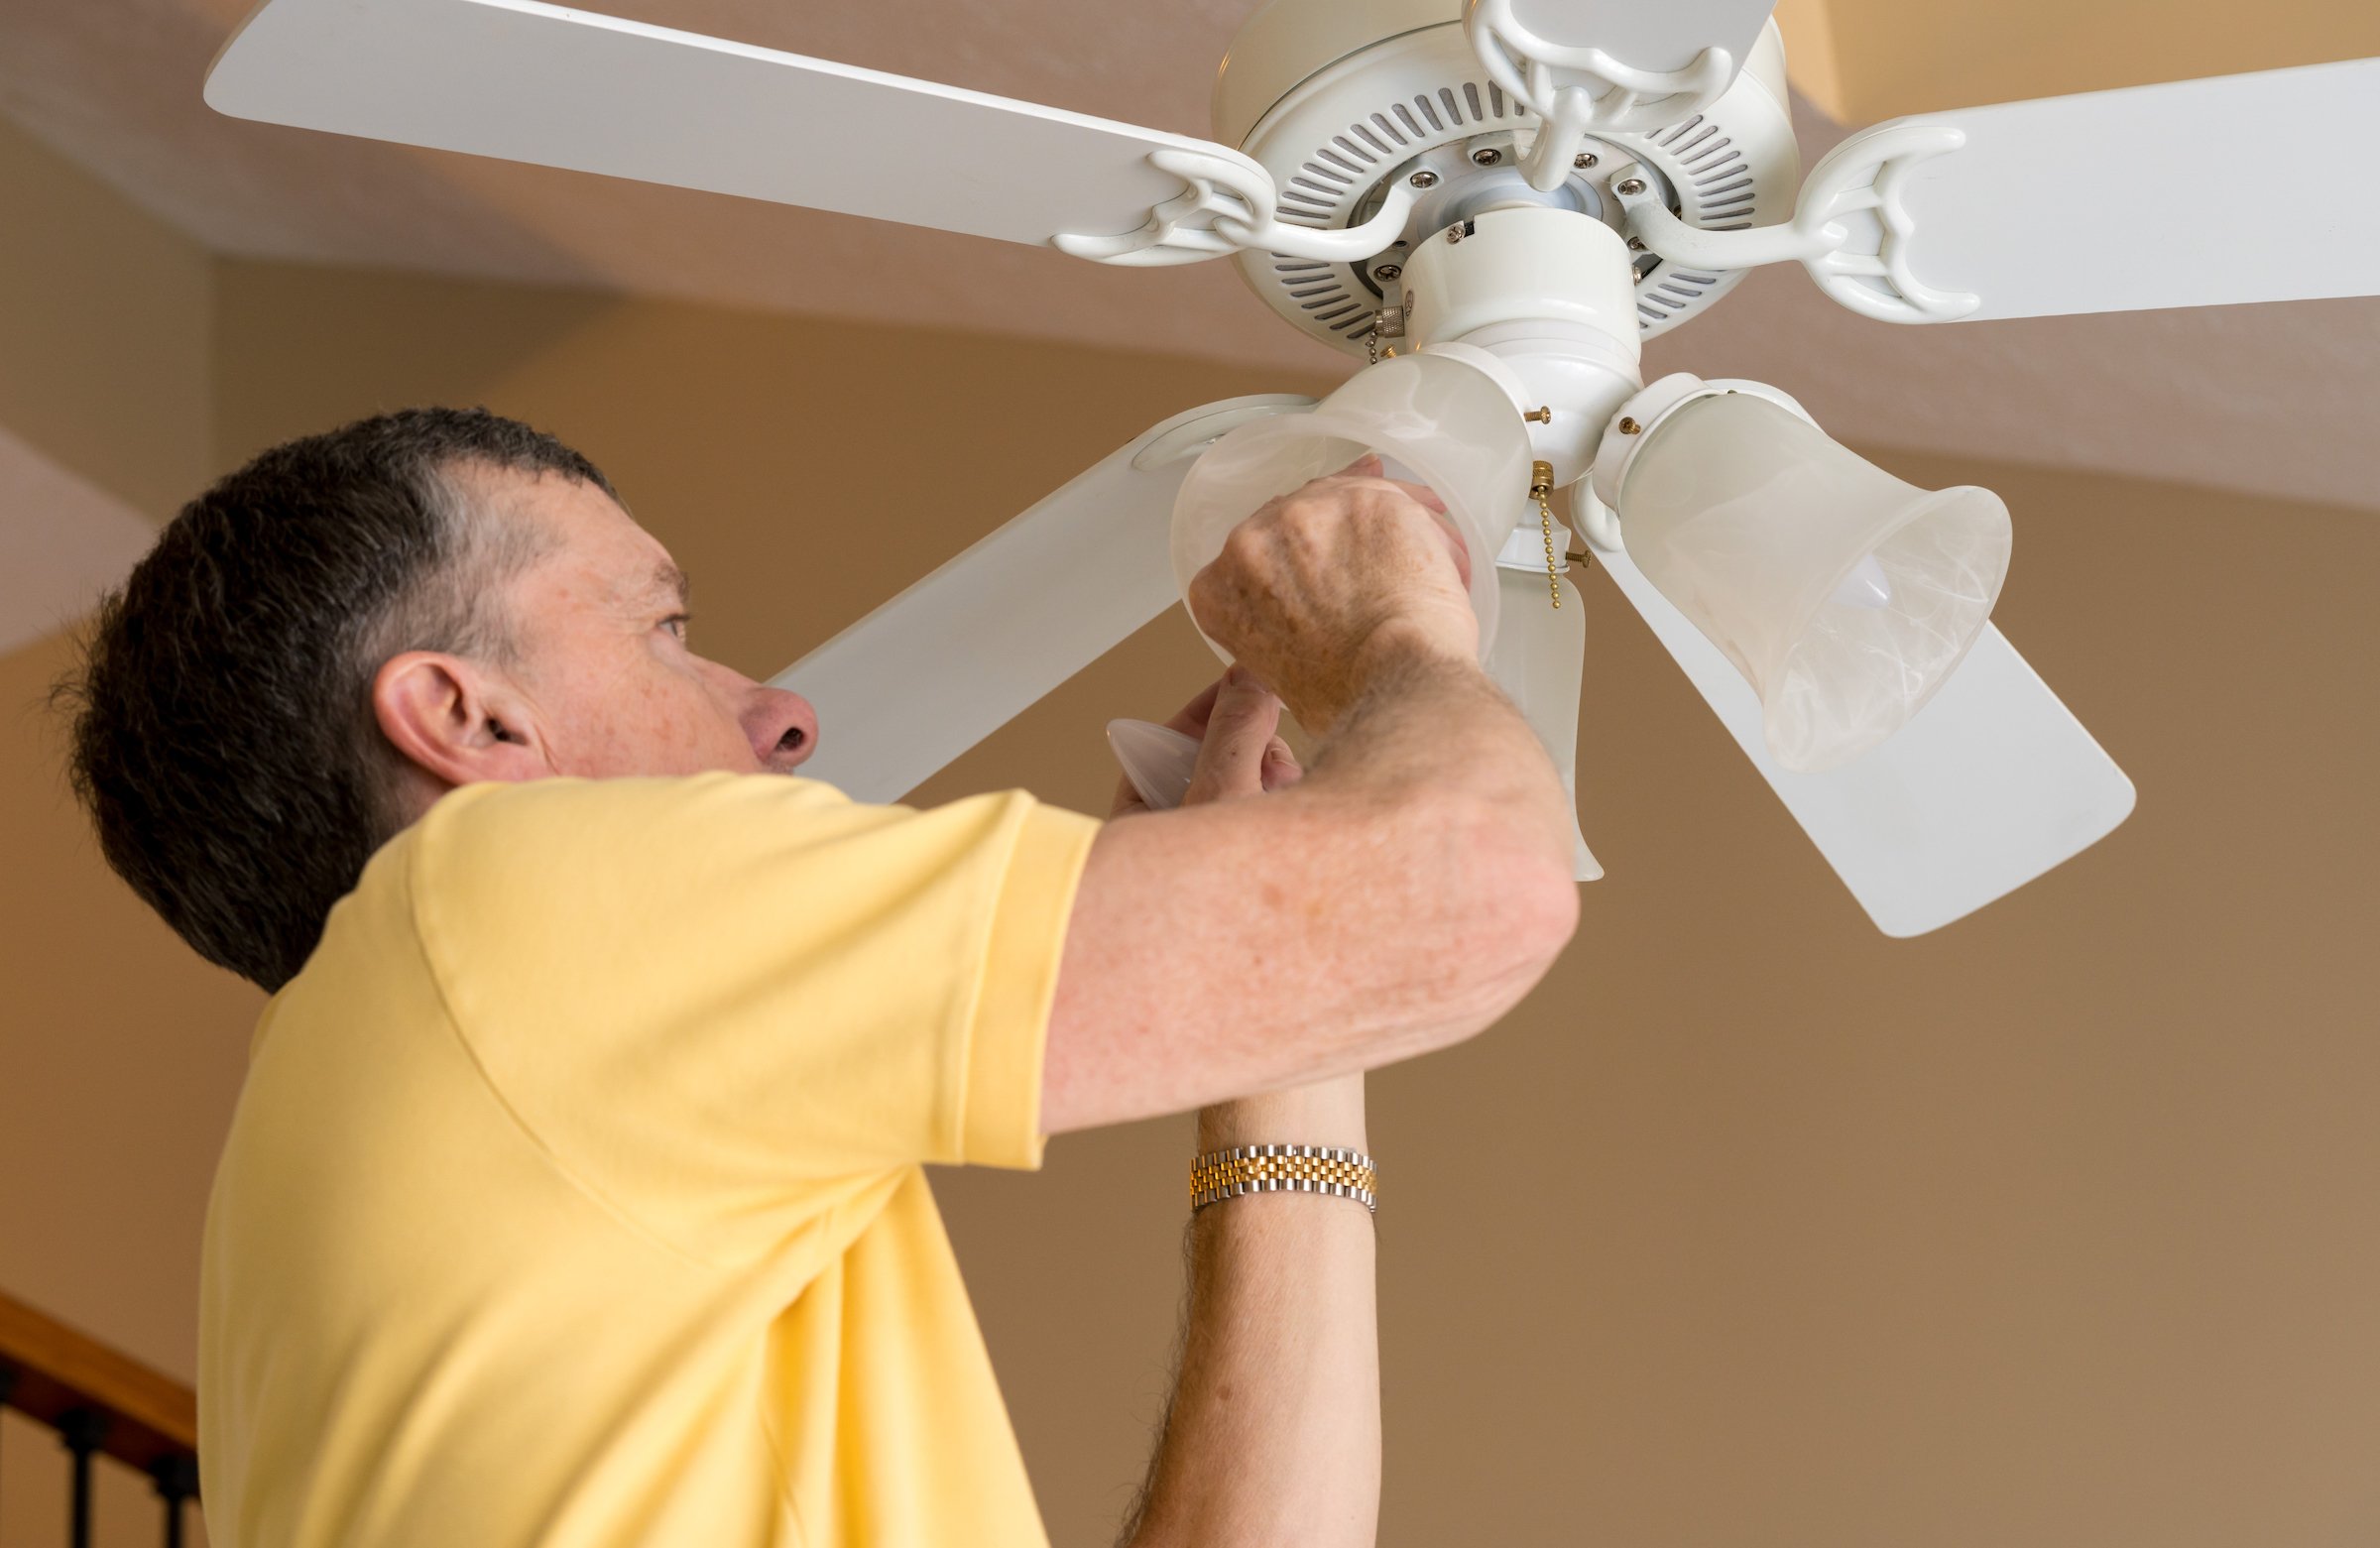
- Swing the motor up and hold it in place while screwing in the screws to secure it to the bracket.
- Put the cowl on over the motor and bracket. The assembly below the motor, to which the light kit up will soon beryllium attached, leave remain exposed.
- Attach the fan blades to the keister part of the motor, which will also be open inside the cowl. These are attached by fiddle-shaped screws.
Backsheesh: Pre-assemble the fan blades before starting installation so they are ready imminent.
- Link up the light kit. It Crataegus laevigata look like there's a whole mess of wiring coming out from the motor, merely don't affright. A circular cardboard cover keeps most of that wiring in station above, with just two wires – blue and white – coming through the hole in the midst of the cover.
- Clip the wires from the wanton kit to the wires that come through the unreal encircle – black goes to downhearted, and albescent goes to white.
- Push every last the wiring up below the unreal circuit As you did with the exciting corner, and attach the light kit to the causative.
- Install your light bulbs and any inflammation enshroud that may make up included, and test your new ceiling fan.
Stumped? Visit a Professional to Keep You Cool
If you're in Dallas, you're in luck. Our professional technicians sack take care of your ceiling fan installation while you kick book binding with an ice cold lemonade. We'll worry about headroom, altitude, emplacemen, or weight support.
All you have to do is book a slot in moments, and our technician can be at your door as soon as the same solar day.
And naturally, every of our parts and labor are covered past our trademark quality guarantee. Spare yourself just about cash, and close to zip, and book your clock slot directly.
Jake Sherman is a paid writer with a background in journalism. Helium is fascinated by home appliances and how they operate. Helium enjoys breakage down complex topics and explaining them in newsworthy shipway. He has been a Puls staff author for 2 years. When atomic number 2's not piece of writing, he enjoys trotting around the globe, trying unacquainted foods, and testing unmarked doors to see if they'rhenium locked.


